Who’s Your MapDaddy? – MapDaddy 4 Bar MAP Sensor with Barometric Correction
Ready to rock your ride handling up to 44psi of BOOST!
New version has a 4 bar MAP sensor combined with a 1 bar barometric pressure sensor to improve barometric pressure resolution.
The ‘MapDaddy’ 4-bar Manifold Absolute Pressure (MAP) Sensor upgrade for the MegaSquirt uses one primary 4-bar MAP Sensor for standard MAP Sensor duties, and a one bar sensor for realtime barometric correction so that your fueling calculations will stay accurate in the event of an elevation change (mountain runs anyone?). The 4 bar primary sensor is supported in MS1, MS2, and MS3, and MS2 and MS3 can use the 1 bar sensor for real time barometric correction.
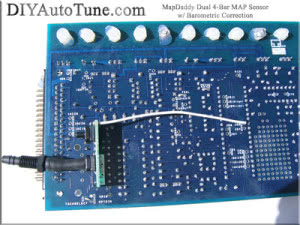
Installation is simple, it just solders right in where the standard MPXH4250 would normally go. One sensor’s nipple lines right up where the 4250’s output would have been, so it will line right up with the hole in your case. A small washer is included for PCBv3 cases that have a larger MAP hole, to be placed on the bulkhead fitting inside the endplate as shown. Then solder the wire from the hole in the corner of the PCB next to the barometric pressure sensor over to JS5 on V3.0 or V3.57 units, X7 on V2.2 units for an MS2 or MS3. On MS1, leave off this connection.
NOTE: You will need about 1/2″ of clearance between the PCB and the case. All of DIYAutoTune.com’s ECU cases shipped since early 2006 have the proper case, some older kits/ECUs may have a different case without the proper amount of clearance. (Look at the endplates, if the endplate with the DB37 is cutout for the shape of the connector it should fit fine, the older cases just had a rectangle cutout for the DB37 connector and will not fit.)
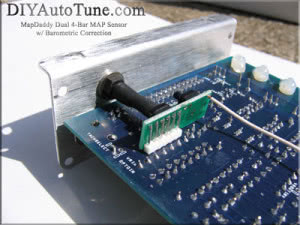
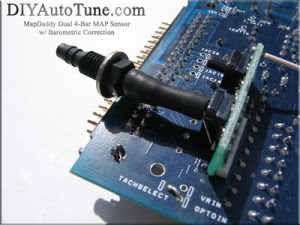
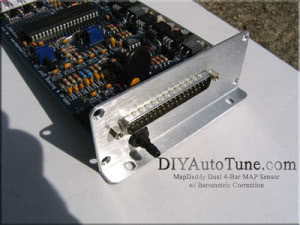
These pictures show an older version of the MapDaddy circuit board, but the new version mounts in the same location.
Software Configuration Changes for MS2/Extra and MS3
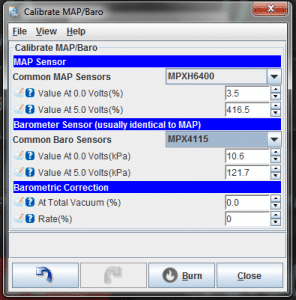
The main setting is under Tools -> Calibrate MAP / Baro. Set the MAP sensor for MPXH6400 and the barometric pressure sensor for MPX4115, then click Burn.
Under Basic / Load Settings, set barometric correction to “Two independent sensors”, and set the realtime baro port to JS5.
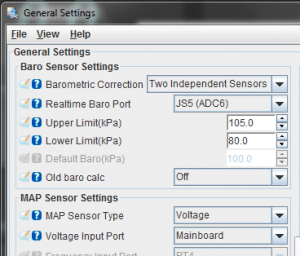
If you plan on running the engine above 6500 feet (2000 meters), you will need to reduce the minimum baro correction value from 80 kPa, as this is the point where normal atmospheric pressure drops to 80 kPa. A value of 60 kPa will be good for up to 13000 feet / 4000 meters.
Note that some older firmwares may put the settings in different locations.
That’s it! Realtime baro correction is enabled on your Megasquirt!
Software Configuration for MS1/Extra 029y4
Note that barometric correction with a different sensor calibration from the MAP sensor is not supported in MS1. This write up covers the current configuration file with an MS3-like menu layout.
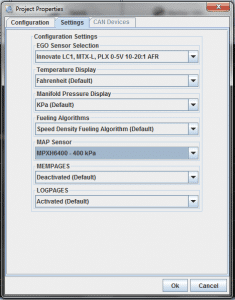
- Go to File -> Vehicle Project -> Project Properties, and click the Settings tab. Set the MAP sensor to MPXH6400.
- Under Basic / Load Settings, set MAP type to 400 kPa and click Burn.
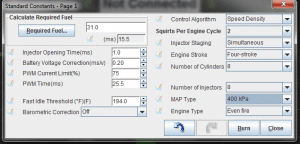
- If using barometric correction, make sure the constant barometric correction is set to “Not fitted”.
- Power your MegaSquirt OFF and back on—this is required before several of those settings will take effect.
That should be it!
If you run across an original MapDaddy with the green circuit board and identical MAP and barometric pressure sensors, see our archived original MapDaddy documentation.

